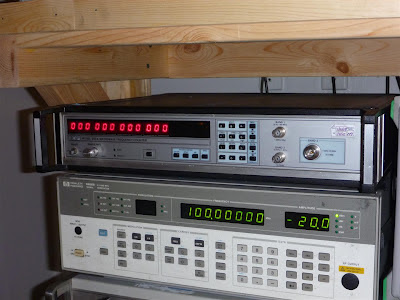
This post is about a frequency counter, specifically an EIP 545A 18Ghz frequency counter that I had purchased off of eBay. The purpose of this post is to describe the steps that I took to repair this specific counter as upon receiving, it was not working. I consider myself very good at troubleshooting and here I will outline the steps I took to get his unit repaired. The physical repair itself was simple as it ended up only being a single cap that was bad, although the steps taken to isolate and troubleshoot this unit to locate this specific cap were very complex. As I repaired this unit I could see remnants of previous people attempting to repair this unit, who had ultimately given up and failed. While normally I would never write about specific repair steps that I had taken, this one was specifically fun, fulfilling, and worth talking about. Hopefully the troubleshooting procedure and methodology I describe here can be of use to someone else.
This specific EIP frequency counter I purchased is older, from the 1980s but is a very solid unit and when combined with a stable 10Mhz frequency reference it is extremely accurate even for its age. The range of prices for these specific units is all over the map, some guaranteed dead units going for as little as $75, with fully functioning and calibrated versions with all options up into the thousands of dollars. Most working units are in the $200 - $500 range in various conditions. This is a steal for a counter of this range, resolution, and accuracy.
I went with my staple bid on the unit that was listed by a seller who did not deal with test and measurement equipment. It was listed as working, but 'we don't know anything about this unit so we are selling it as-is' by the seller. The auction showed a picture of the actual unit powered up with all zeros on the display and no reported errors during power up. The seller also stated if it didn't work it could be returned as well. I purchase a lot of equipment this way. There is a risk involved as it could have been messed with and someone is lying and unloading it, but often I end up with a great piece of gear in these auctions. Based on all the info I had I went for the purchase.
Sold.
Upon receiving the unit the first thing I noticed is the calibration stickers had been broken indicating someone had been inside the unit, big red flag. Why was someone inside it if it was working? I wanted to know so I took the main cover off and looked inside. Other than being very dusty which I promptly blew out with an air compressor, nothing seemed loose or broken from shipment. Some board clips were broken indicating someone had removed a few modules at one time, the plastic gets brittle with age. There were a few boards missing but these were to a few options that this specific unit did not have installed that I was already aware of so we should be good. The good news is it looks like no modules were cannibalized from it for a different unit. To the bench to power up:
Upon power on the display came up, registered all zeros. So far so good. The top of the unit had a couple of the basic self tests labeled right on it, starting with test 01:
Test 01 injects the internal 10Mhz time base through a few multipliers into the counter to verify the time base reference, signal chain, and local oscillator. Unfortunately instead of displaying 200Mhz, the display was all blank.
Fail.
Now I know why the calibration stickers were broken, someone had most likely been poking around inside in an attempt to fix. This could end very badly.
The good news is all of the other self tests passed. There were no ram / rom errors, all display and keypad functions worked, and overall the unit seemed fine with no additional reported errors. Using my HP 8656B RF frequency generator as an RF source on the counters inputs resulted in the same result, no frequency displayed. So the troubleshooting begins.
Once opened back up, the first steps are a simple visual inspection. Is everything plugged in? Do all cables seem to be routed appropriately, as in not plugged into the wrong locations? Is anything look loose or moving around? Have any zip-ties been cut indicating wiring harnesses have been moved around or replaced? In this case the answers were no. For the most part everything seemed tight and undisturbed.
The basic internal layout of the unit is pretty straight forward. Starting on the left you have a linear power supply followed by a series of removable cards. The digital section is on the left followed by the analog section on the right. On the very right you have the 10Mhz oven reference oscillator and the RF converter / mixer assembly.
The 10Mhz reference oven oscillator is a prime candidate for failure or issues. I had noticed that the main processor board had its own crystal so it was most likely not using the reference 10Mhz for clock. If the reference oscillator had failed it would be an easy explanation for why the RF frontend was not able to downconvert any input frequencies and not report the internal 200Mhz test. I probed the 10Mhz oscillator, and it was indeed oscillating at 10Mhz. I then tried my external 10Mhz source to see if there was any difference, which there was not.
To further troubleshoot I first re-seated all of the modules and connectors I could see. After 30 years connections can become corroded, dust can work its way into connections, and connectors can be come loose from shipping it around. Note at this point I removed the very leftmost card out of the unit. It is the GPIB interface card and is not necessary for proper operation of the unit. Removing it now just removes one additional variable out of the counter. Once everything else was re-seated, I powered up again but still no success, test 01 fails and any external RF input results in all zeros on the display.
The next step was a simple visual inspection of every board. I pulled everything out and looked at each board for any obvious signs of burnt or charred components, leaky caps, chips with holes blown in the top of them, etc. Everything looked clean and pristine. So time to dig deeper.
One of the very best parts of older equipment is the easy availability of service manuals. After a minute of searching I had the complete user / operation manual and the complete service manual. The really cool part of the service manual, and something you never see anymore is a complete schematic for the counter.
Win.
With the schematic I now have details on the power supply including correct voltages and test points. Most service manuals, this one included, will also have some simple flowcharts to help diagnose and troubleshoot any operating abnormalities. In this case I found the flowchart for a failed test 01, following this flowchart I ended up with a result of: 'Impedance converter or signal select on A109 bad'. Well, this is good and bad. It's good because at least it is isolated to a specific board. It's bad because this board is a very complex analog board so troubleshooting it will not be fun. Time to check some voltages.
Probing the voltages, everything seemed present, +5v, -5v, +12v, +18v... but -12v seemed to be missing! Before getting too excited, I powered the counter down, unplugged the power cable from the power supply to the main board, powered back up and measured again. -12v was now present. So something in the unit was sinking -12v to ground. Module A109 which had been previously identified via the service manual flowchart was the first board I was going to look at. I powered the unit back down, reconnected the supply cable, then pulled module A109. When powered back up -12v was still present, so this board was indeed the culprit.
Now going to the schematic for this module I isolated the -12v and ground pins on the edge card and measuring for continuity it was a dead short. So something on this specific board had most likely failed closed causing the problems. Going to the schematic I located every -12v entry point to the circuitry, there was a lot. Over 30 in total.
Semiconductors are usually my first guess for failing, so I began to check all of them first. There was only a handful and all of them appeared to unfortunately check out correctly so time to move on to the passive components. After probing a few caps and resistors that were good candidates based on their location ( between ground and -12v ) I needed to segment the board up further to better isolate portions of the circuit. To do this I would make small cuts in the -12v traces on the bottom of the board probing in sections.
By divide and conquering I eventually ended up at a small .01uF cap, C48 to be specific. Removing one leg of this cap, resoldering my cut traces, and reinserting the board followed by powering up and test 01 resulted in a nice clean 200Mhz frequency on the display.
Success.
So a single .01uF cap was all of the trouble. A ten cent component was the reason that this unit was removed from service and sold on the surplus market for next to nothing. It's sad in a way that such an amazing piece of gear can be considered obsolete with no one willing to spend the time to fix it. Granted to most corporations this piece of gear was wrote off in the books decades ago and to pay someone to spend time repairing it would never probably happen. But for me... it's a huge win. I replaced the bad cap with a new one along with a few other on the board just because it was easy and now have a rock solid, 18Ghz frequency counter with great calibration on my RF bench for about two hours of time spent troubleshooting.
FTW.


